
Hello Chief, this is a guide on luring and destroying the enemy Clan Castle troops.
Author's note: I'm no longer maintaining these guides, these guides were written back in 2015 so much of the information here will be outdated. For example, at higher levels, it may not be feasible to lure out CC troops entirely and just deal with them as you attack, because of time reasons. I personally wouldn't mind anyone fixing broken image links and spelling errors on any of these guides, but if you'd like to majorly rewrite the guide, please tell me on my wall.
Why Lure Out the Clan Castle Troops?
First things first, let's boil this down to the basics.
- The Clan Castle stores reinforcement troops that can be used for both attack and defense.
- Each troop except the Healer is capable of dealing damage.
- When defending, they don't wreck the defender's base, but help defend the defender's base by attacking the attacking troops.
- Since Clan Castle troops (except Healers, of course) are capable of dealing damage, they will deal damage to the attacking troops over time.
- As if defenses weren't enough, the Clan Castle troops add insult to injury by slowly wearing down your army. Also, they distract any troop that has no favorite target, hence forcing these troops to kill off all the Clan Castle troops before they continue destroying the defender's base.
- As these Clan Castle troops support the defenses in destroying the attacker's army, the attacker's army will die off faster. When the army dies off faster, there will then be less time to destroy the base, and less overall damage will be done.
As you can see, Clan Castle troops are capable of ruining an attack; they can cause chaos and mayhem in the defender's base.
This is why most attack strategies encourage luring of the Clan Castle troops; if lethal troops are inside the Clan Castle, the attack is as good as ruined.
Do I need to lure out Clan Castle Troops?
The answer is not always "Yes", because some armies take enough time such that luring the clan castle may cause the attack to run out of time, and some armies are powerful enough such that luring isn't necessary. You always have to remember that luring the Clan Castle takes time; perhaps up to a minute or well over that. You only have three minutes in battle; luring may be time-wasting if your army composition is slow to deal damage.
Consult the following table, just for kicks. These are my recommendations, you do not need to obey.
| Armies in which you should lure out CC | Armies in which you do not need to lure out CC (but you can if you want to) |
|---|---|
|
|
Luring the Clan Castle Troops (if you do, that is)
Luring the Clan Castle is important in many attack strategies, as you can see in the table above. Without it, the attack might fail easily!
You should lure out each and every troop, be careful!
Before luring the Clan Castle troops, have these few general rules in mind:
- Do carry some troops for the purpose of luring the Clan Castle. This allows you to adapt to any situation when raiding normal villages, and is extremely important in Clan Wars. In the event that you do not know the contents of the Clan Castle (which is usually the norm), consider the worst-case scenario where the Clan Castle is filled with all-Archers.
- Always lure out each and every troop from the Clan Castle. Make sure each and every troop is out of the Clan Castle before committing to killing them or otherwise starting the attack. Extra troops might stay in there and ruin your attack if not lured out properly! Do get them all out, even if it's a pain, and commit to having extra troops just in case.
- Do count the number of CC troops that sortie out. With practice, you can easily do this mentally, just count up for each troop that comes out, but be sure to count correctly or you might waste extra troops in luring the enemy Clan Castle! Some useful numbers to remember are 1 for Archers, 4 for Wizards, 12 for Witches, and 20 for Dragons.
- Scout the opponent's base whenever possible to check for amount of CC troops. If there are none, there is no need to lure! In Clan Wars, that means that you do not need to train troops for luring the Clan Castle, meaning you can deal a stronger attack on the enemy! In all cases, that also means you can start your attack immediately and not waste time luring and killing them.
Triggering the Clan Castle
There are four different types of Clan Castle lures, and they are for the different positions of Clan Castles that I've explained in my CC as a defense guide: outside, non-central, central and unlureable.
Triggering an Outside/Near-outside Clan Castle
A Clan Castle in a position like this is bound for a super-easy lure, but watch yourself for hard troops!
While it is the simplest and easiest lure, do not get lured into a false sense of security; it may be tough to deal with some troops!
Difficulty: Easy
Housing Space Required: <10 You can sometimes lure them out with only 1-2 troops.
Recommended composition for luring:
- 4-10 Barbarians or
- 6-10 Archers or
- 1-2 Giants
Procedure:
- Deploy your first troop to check for traps around the side with the Clan Castle.
- Deploy troops one at a time to slowly lure out the Clan Castle troops.
- Congratulations (not really lol)! You have triggered an outside or near-outside Clan Castle. Proceed to lure them to someplace safe (for you, that is)
Triggering a non-centralized Clan Castle


This case isn't the easiest to trigger but still possible.
Not the easiest but it is still doable with 100% consistency.
Difficulty: Easy-Medium
Housing Space Required: 5-25
Recommended composition for luring:
- 2-4 Giants or
- 2-4 Balloons or
- 2-5 Hog Riders or
- 1-2 Wall Breakers supporting Giants
Procedure:
- Deploy one of these troops to check for traps and simuntaneously trigger part of the Clan Castle.
- Deploy the rest of your troops all at once to create a small "meat trigger" to draw out the rest of the Clan Castle troops.
- Proceed to lure them someplace safe with luring steps (shown below)
Triggering a Centralized Clan Castle

Centralized Clan Castles are fundamental to most farming bases, and as such you'll have to get used to them when farming.
You'll have to get used to this if you intend to attack farming bases regularly, as these bases usually have highly centralized Clan Castles! Note that these lures are still not impossible, though.
Difficulty: Medium-Hard (depends on base size)
Housing Space Required: 20-40
Recommended composition for luring:
- 2-4 Giants plus 2-5 Wall Breakers or
- 4-8 Hog Riders or
- 4-8 Balloons
Procedure:
- For Giants, drop one to check for traps, then drop Wall Breakers to open up a compartment surrounding a defense. For Hogs or Balloons, simply drop one first for trap checking, then drop the rest to start luring out the Clan Castle.
- Deploy remaining Giants, Hogs or Balloons to keep the "meat trigger" alive.
- And lure them to relative paradise.
Triggering an Unlureable Clan Castle

Nearly impossible to deal with, but it's not impossible!
These Clan Castles, although rare, are practically unlureable, even with Hog Riders at your disposal! You might need half an army to even just trigger the Clan Castle, which leaves no room for damage! Plus, triggering and luring and killing might take half the battle, so there'll be a lot of stress when trying to destroy the rest of the base!
Hence it is better to use an army composition where luring the Clan Castle isn't really needed; most unlureable Clan Castles are found in spaced out bases which can be wrecked easily by Golem-based armies.
But if you really do want to trigger such a Clan Castle, well.....
Difficulty: Hard
Housing Space Required: 60+
Recommended composition for luring:
- 10-16 level 4+ Hog Riders plus 2-3 Giants or 5-6 Wall Breakers or
- 10-14 maxed Balloons plus 3-4 Hog Riders or Giants
Which composition you use depends on the placement of the Air Defenses. If they are found near the outside, use hogs for triggering the CC; if the Air Defenses are in the core, use Balloons (unless you do not have them maxed)
Procedure (Hog Method): (use this if the Air Defenses are in the hog-ring)
- Use single Hogs to trigger any Giant Bombs in suspicious 4x2 spots (most unlureable CCs are found in hog rings and hence attempt to be anti-hog)
- Deploy the rest of the Hog Riders to eliminate one side of defenses around the "hog-ring". These hogs also serve to eliminate Spring Traps which can prove fatal to your Giants.
- Send in Wall Breakers and Giants to trigger the Clan Castle like you would do with a central Clan Castle.
- Congratulations (for real)! You have triggered an unlureable Clan Castle.
Procedure (Balloon Method): (preferably use this if the Air Defenses are in the core)
- Choose the side with the least Archer Towers or no Air Defenses. This side will be the side you will be attacking and triggering from.
- Deploy one Balloon per Cannon, Mortar or Wizard Tower, and two Balloons per Archer Tower. This is the reason why I recommended luring from the side with the least Archer Towers; the Archer Towers deal enough damage to take down a single Balloon if they are well-upgraded. Use two Balloons for every defense protected by X-Bows that are set to ground and air mode, just in case. In the event that a Seeking Air Mine takes down a Balloon you can always send another one to replace the lost Balloon.
- Once every defense is taken down, send in the Hog Riders or Giants from the side with destroyed defenses; they should be able to trigger the Clan Castle.
Drawing the Clan Castle Troops somewhere safe
Now that you have made all the enemy Clan Castle Troops leave the comfort of the Clan Castle, you will have to kill them. But killing them in the midst of the battlefield where defenses fire upon your troops is not the best idea possible. Generally you will want no damage on your troops coming from defenses so that you can kill the enemy Clan Castle troops cleanly and without extra troops to compensate for the defenses' damage.
Step 0: Army Composition
Note the AI of non-Healer CC troops; they will head towards the closest attacking troop, regardless of how much time it takes to reach the aforementioned troop. This holds true even if there is only one attacking troop on the battlefield at that time. Also, troops that can only attack ground will not act against any air troops on the battlefield. Hence they will not budge if a Balloon or Minion comes into action and nothing else.
For the purpose of drawing the Clan Castle Troops out towards a corner or somewhere unprotected, we are going to consider three different troops for the job: Archers, Minions and Giants. These pros and cons are shown in the table below.
| Archers | Minions | Giants | |
|---|---|---|---|
| +Pros |
|
|
|
| -Cons |
|
|
|
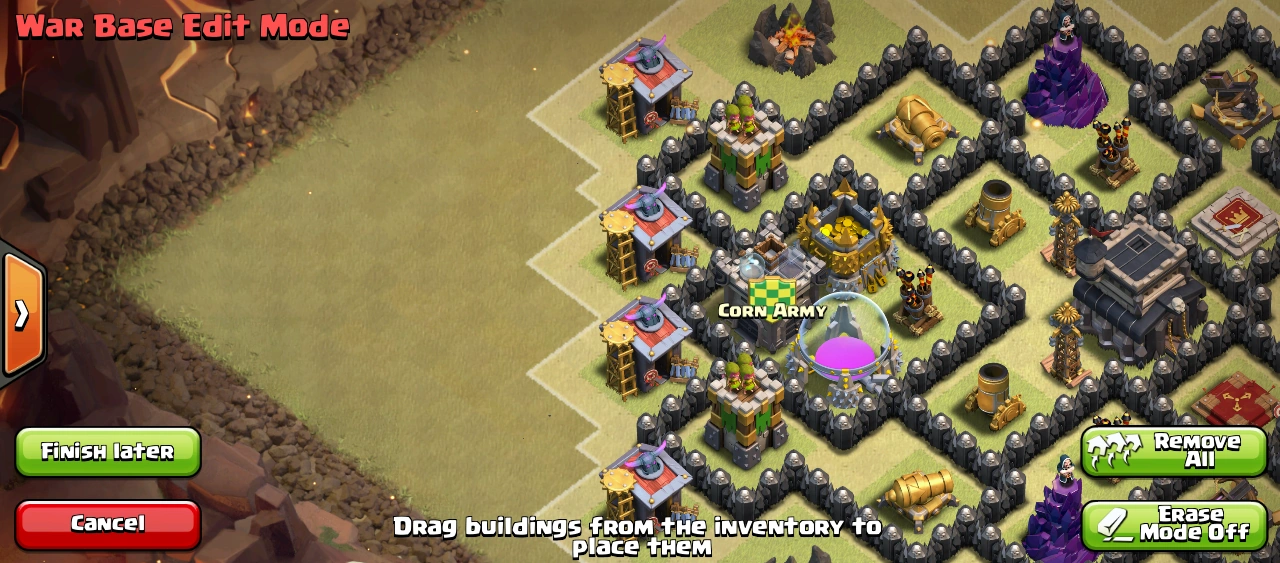
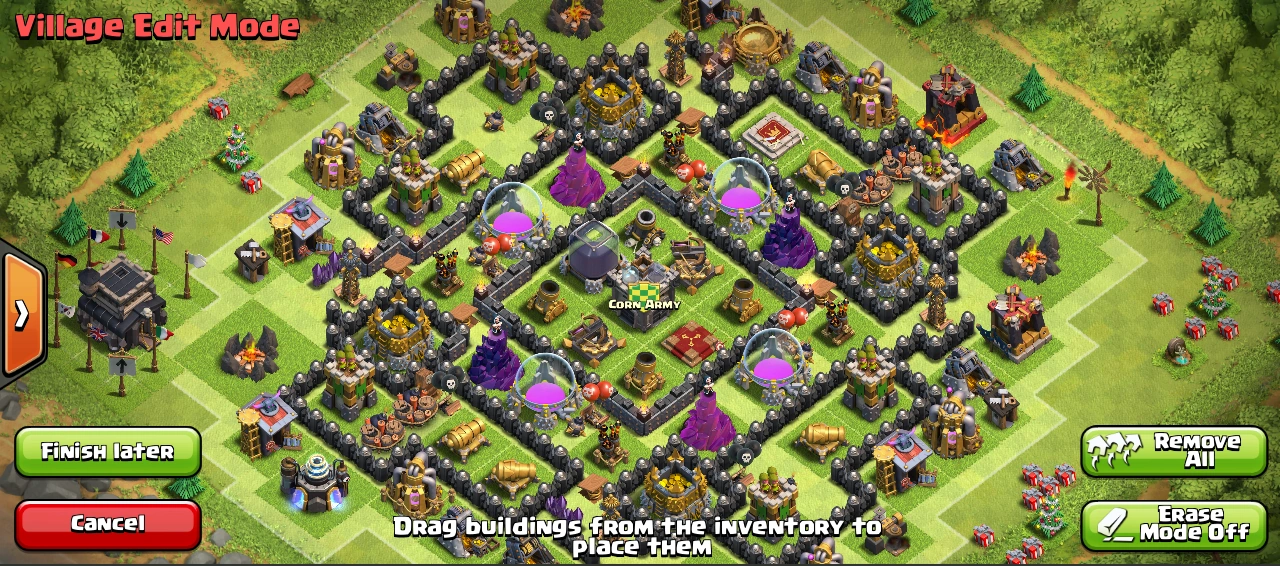
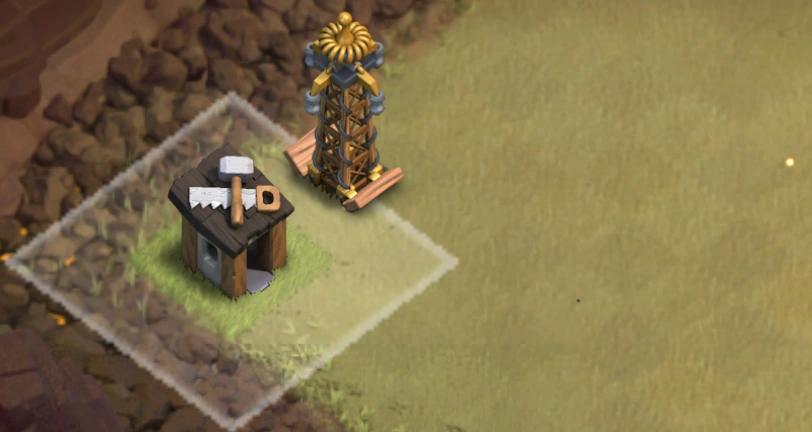
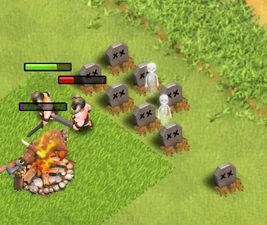
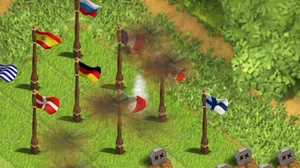
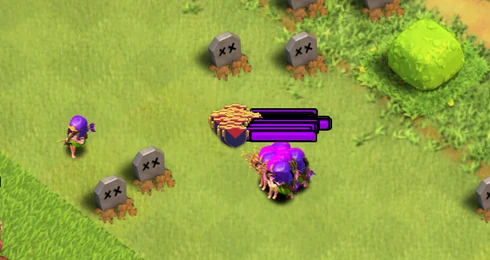
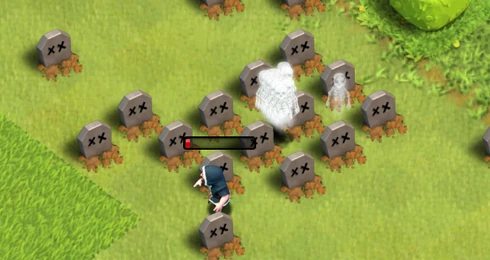
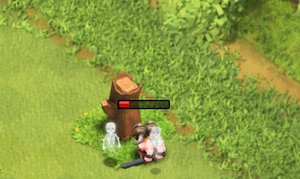
Step 1: Check for exposed buildings

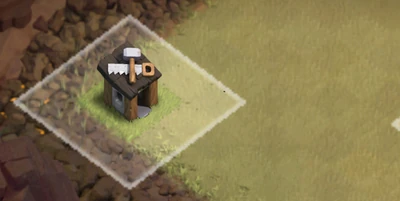
This Builder's Hut is the perfect place for drawing troops to their deaths.
Before you commit your full force to drawing out the CC, check for exposed buildings with Minions or Archers (or other weak ranged troops that you might prefer). If there is one at all, we are most likely done; just use another few more Archers to gather up the troops if necessary (depends on your method of killing the enemy CC).
Start from the corners, then work your way sort of inwards. The corners are your best bet, as players most likely place some exposed buildings they have there as an anti 3-star mechanic, especially Builder's Huts. These buildings are missed very easily, but hey, you have at least 30 seconds to find them before you even start the attack for real.
Note that you can grab these corner buildings with lone Barbarians, but since they deal more damage, Archers are more suited for the job as they will take more time destroying the building, thus leaving more time to draw out the CC. Note that the drawback of using Barbarians are rather negligible when the building's hitpoints exceed about 500, in which case there is not much of a difference using either Barbarians or Archers. Do note, however, Minions will destroy buildings like this much faster.

However, usually, not many high-hitpoint buildings will be found in the corners, and thus your troops might destroy the building, leaving no chance to easily draw out the CC. This can be alleviated in three ways:
- Find a building with more Hitpoints. The reasoning is simple: the more HP the building has the longer the troop will take to destroy it. Hence, the more time there will be for CC troops to reach your troop. A building with 500 HP is sufficient, and any with at least 1000 HP is practically a guarantee. Most levels of Gold Mines, Elixir Collectors, and Dark Elixir Drills satisfy this requirement, and so do higher-leveled Barracks and Dark Barracks.
- Use troops that deal less damage. This may sound counter-intuitive, but it is a true fact because the time taken to destroy a building is determined by the hitpoints divided by damage per second of a troop. However this may not be the best option as not many people would like to keep their Tier 1 troops at lower levels if possible.
- Deploy your troop closer to the CC troops. As in deploy it to be still in the grass plains where it will still snipe the corner building. If the troop is closer to the enemy Clan Castle troops then the Clan Castle troops will reach your troop in less time. Hence it'll be an easier draw-out of the CC.
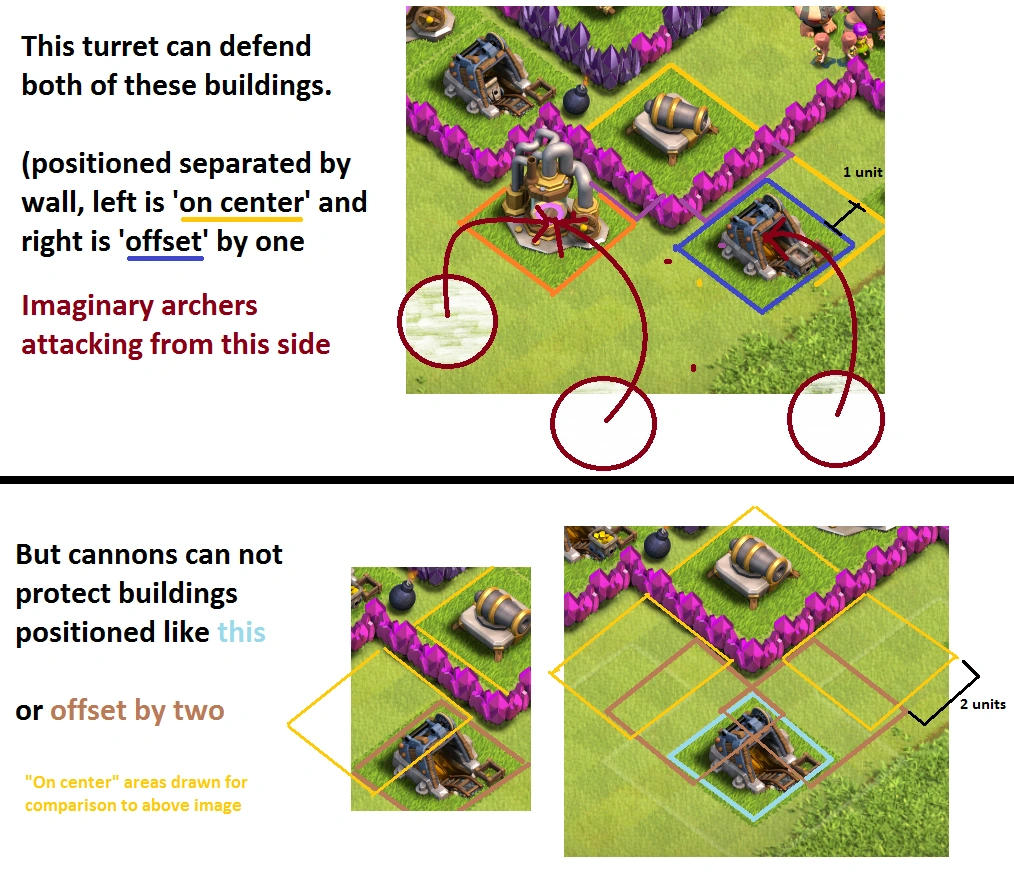
If you cannot find corner buildings at all, the next move would be to find a building on the edges of the base but still out of range of the defenses. You need to be precise and spot them within the 30 seconds you get before the battle or quickly enough after you lured the Clan Castle. Use the diagrams on the left to help yourself spot blind spots of Cannons and Archer Towers.
If you use Minions, you can easily find blind spots of Cannon-only areas. As stated above, this only works well if the whole Clan Castle defense is capable of anti-air.
Don't really worry about the range of a Wizard Tower, unless it is on-center, it won't be able to hit your Archers or Minions if placed correctly.
Against buildings protected only by Mortars, it is rather easy due to their rather low DPS; use Barbarians and drop them one at a time. The Mortar will most likely take two or three hits to kill the solo Barbarian, which means the Barbarian will last extremely long to draw out the Clan Castle troops.
In the worst-case scenario, where you cannot find such an exposed building at all, use a Giant to help draw out the Clan Castle troops. Deploy them as far away as possible from the base to assure that the Giant survives as long as possible to make the Clan Castle troops move out.

If a Tesla is protecting a building that looks exposed, well, good luck :P
Special Scenario: A Tesla is protecting an exposed building
So you have deployed an Archer on a corner Builder's Hut, only to find that the corner Hut is secretly guarded by a Hidden Tesla! What do you do:
Solution: It is always best to avoid the Tesla instead of fighting it. Do find another exposed building, despite the other problems this might put you into. If there are none, just draw the Clan Castle out with Archers in a place where defenses would kill your Archers slowest, preferably a place that is only protected by a Mortar.
If you do know the existence of the Tesla (previous war attack, etc.) then it is best to adapt to that situation: use a Giant or two, and support it with a couple more Archers or Barbarians.
Step 2: Finishing the Draw-out

If all the CC troops are in the same circle then you're in luck, skip this step
More often than not, all the troops in the Clan Castle will not be moving at the same speed, and some troops will be faster than others in that case, meaning that these troops will engage your troop and most likely kill them before the rest of the troops make it to where you dropped your draw-out troops. If they are not, then simply proceed to Step 3.
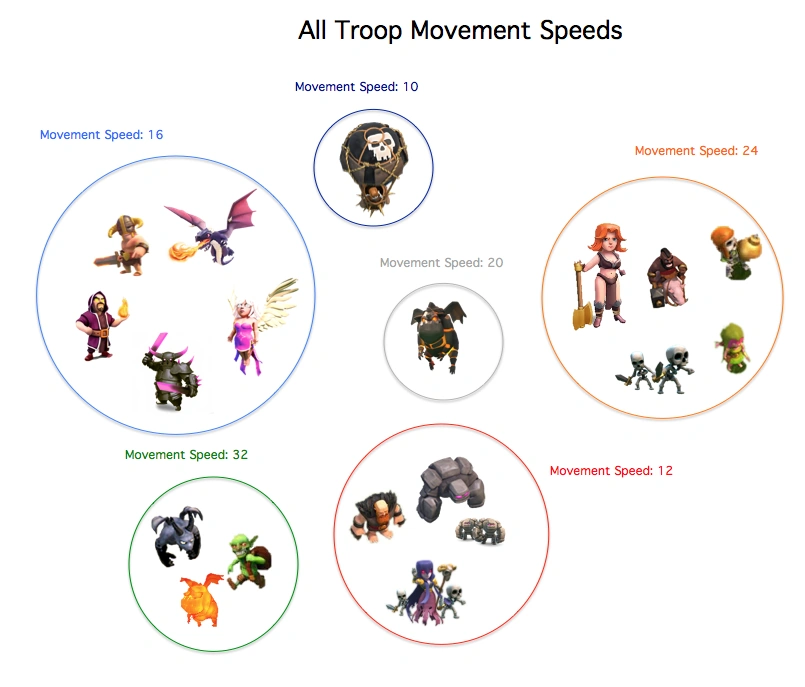
Use the picture on the right to help spot troops with similar movement speeds; if all of the Clan Castle troops belong to one circle then they all have the same movement speed and you should have drawn most of them out as shown in Step 1.
All you need is a few more Archers, Minions or maybe one more Giant. I hope you didn't bring only one Archer for the draw-out because that means the troops you'll use to kill the CC will have to be expended to finish the draw-out (unless your method of killing is the Lightning Spell, in which case you're probably more often in trouble than not).
Execute this step as you would with Giants, dropping them as far away from defenses and CC troops as possible. If that's not possible, deploy them at a point on the edge of the map still close to the CC troops but with minimum damage and interference from defenses so that the troop survives as long as possible.
If you're using a Tier 1 troop to complete this step, you might want to drop them in a range of a Mortar but nothing else if you can't find any blind spots. Be sure that the CC troops is close by, or you will have wasted the entire Step 1 of this process.
Once the last troop is in the vicinity of the draw-out troops you have used and that they are out of range of any defenses, you're free to proceed to Step 3.
Step 3: Grouping the Troops Together

Do these troops need to be grouped in order to be effective? It really depends on what you're using to eliminate the CC troops.
Note: This is an optional step. But depending on what you're using to eliminate the Clan Castle troops, this step might be necessary.
This is an extra step that might be necessary for your kill squad. It really depends on what your kill squad consists of, and is shown in the table below.
| "Kill Squads" where grouping isn't necessary | "Kill Squads" where grouping is recommended (but not necessary) | "Kill Squads" where grouping is necessary |
|---|---|---|
|
|
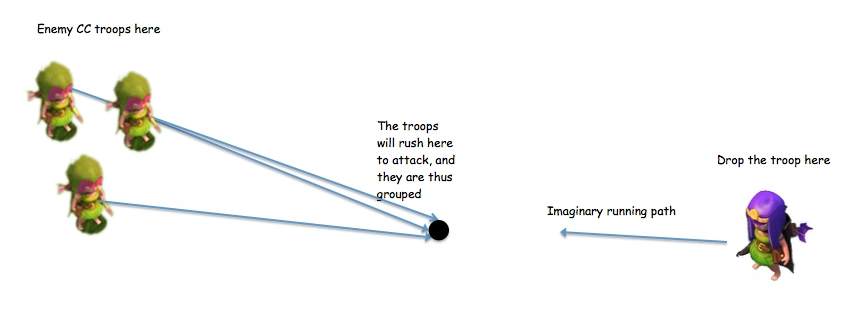
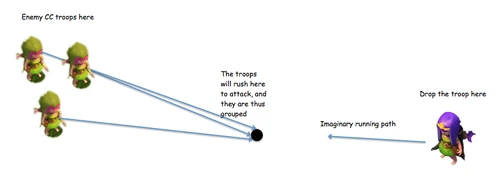
This is a simple model of why grouping would work
In the case that your "kill squad" requires the grouping, you will need a few more Barbarians and Archers. What you'll need to do is to deploy them at a point where the troops will converge to a small pack when they meet your troop. In theory, see the diagram on the right for an explanation of how it's supposed to work (note that in practice, troops will travel in a straight line towards your troop, and you will have to think a bit on where exactly to drop your troop to group with the most efficiency).
A group that is no looser than 0.3 tiles apart from front to back is great for the next step, but generally about 1 tile is acceptable (for other compositions). Note that the splash radius of the Wizard and Dragon is both 0.3 tiles and this makes it very easy for them to finish off the CC for you. The Balloon's death splash has a radius of 1.2 tiles, and that is enough to kill even rather loosely packed groups.
Once that is done, we are completely finished with preparing ourselves for killing off the Clan Castle troops. Gee whiz. :P
Destroying the Clan Castle Troops
Alas, I believe I have explained enough on luring out the Clan Castle troops. But you cannot just start the attack with CC troops exposed and still ready to defend - you still have to eliminate them.
This is the second fundamental that is necessary in order to successfully deal with the Clan Castle troops.
Think about it: If you don't lure them out, what's the point of your kill squad? If you don't destroy them, the enemy CC will still destroy your troops if left unchecked.
Now let's get straight to the point. There are many different methods to use to deal with the enemy Clan Castle troops, many different kill squads possible, all to the same effect - dead CC troops.
I will sort these methods by Town Hall level. Basically, the more advanced your army, the more methods of destruction you will be able to use.
For all TH Levels
Using your Clan Castle

When in doubt, your Clan Castle may be a good option.
The reasoning behind this method is that you will need to fight fire with fire. Often, especially in Clan Wars, you will find high-level troops defending the base. At lower Town Hall levels, especially those levels where you only get entry-level troops, it will be hard or even impossible to fight the maxed troops.
Advantages:
- Able to use troops that are potentially better than what you might have
- Able to use your own troops for attacking the base instead of killing the enemy CC
- Easy execution (only two taps required to kill the enemy CC if done correctly)
Disadvantages:
- You have no control over these troops whatsoever; the most powerful troops often come out last
- Troops deployed from your CC are usually grouped when they start to attack; this makes troops with splash damage (e.g. Wizards) have the advantage
Specialies in: Multiple different situations, depending on what is in your Clan Castle at the time of attack
Army Compositions this Kill Squad can be used for: Anything
Kill Squad Composition: It is up to you to decide what to request. The best choices are a combination of Archers and Wizards, or maybe Witches or Dragons. It all depends on the situation. Outside of war it will be almost impossible to find the perfect situation, but when you do know the Clan Castle composition (perhaps from a previous attack on the base) then it is going to be very effective:
- If there are no Wizards defending the base, you're best off overwhelming the enemy troops with Archers and Witches.
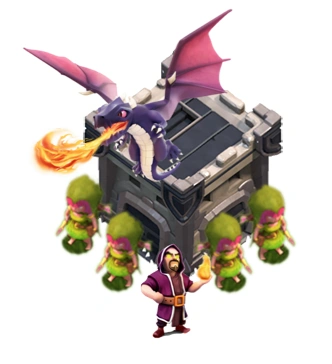
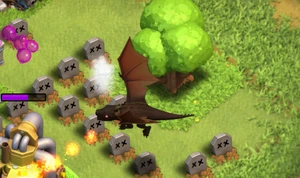
- If there is a Dragon defending the base, a combination of Archers and Wizards is good, but a Dragon supported by a few distraction troops works well too (these distraction troops are crucial when your Dragon is lower-leveled than the enemy's one).
- Fight any Witches you might encounter with Dragons or Minions. Witches are weak against air troops because their skeletons are incapable of attacking air. A Dragon or a few Minions can make short work of a Witch.
- If it is an all-Wizard only CC defense, group them really tight, and finish off with a Dragon from the Clan Castle.
- If the entire Clan Castle defense contains only troops that cannot attack air then it should be dealt with by using air troops in the Clan Castle. It should be trivial to know that there will be no resistance whatsoever from the enemy Clan Castle. Note that this does not mean that there will not be any resistance from the defenses themselves, nor traps.
Execution:
- Request for appropriate troops from your clanmates. Preferably have them as high-leveled as possible.
- Once in battle, and the lure has been completed, deploy the Clan Castle you have.
- Well, that's it.
Using Barbarians and Archers
A good strategy to eliminate the Clan Castle troops at all levels. This kill squad focuses on the fact that these troops can easily overwhelm the enemy's troops and hence, run through them. You can easily eliminate most Clan Castles using this kill squad, but it does require quite a few troops to pull it off.
Advantages:
- Runs through most Clan Castle defenses (archers-only, archers+wiz, etc.)
- Cheap and fast kill squad means that it will not add much training time to your overall army
Disadvantages:
- Cannot work well against Air Troops, especially Dragons
- Barbarians will be mauled by any defending Valkyries, leaving Archers defenseless
Specialises in: Ground troops that don't do splash damage (e.g. Barbarians, Giants, Hog Riders, PEKKAs)
Army Compositions this Kill Squad can be used for: Barch, BAM, basic Giant attacks
Kill Squad Composition: Basically, for this kill squad composition you can have any ratio of Barbarians to Archers that you want, but I prefer to keep Barbarians and Archers in a ratio between 1:3 and 1:2. You don't want too many Barbarians unless the whole CC defense is made up of Archers. Remember, the Barbarians are there to meatshield the Archers. The Archers will help to eliminate the troops, especially those that do splash damage so that the Barbarians will not be wasted all at once!
Execution:
- Deploy a few Barbarians first to get the CC troops distracted. They won't last too long so drop your Archers as soon as possible!
- Make sure you deploy Archers in a spread-out fashion, preferably as loosely as possible. Any arc of Archers beyond a semicircle is more than enough. Not doing so means that troops with splash damage will eliminate your troops in a flash!
- As the initial Barbarians die and Archers start getting targeted, deploy the other Barbarians to distract melee troops, and to attract splash-damaging troops like Wizards, or to kill such troops while they are working on the Archers.
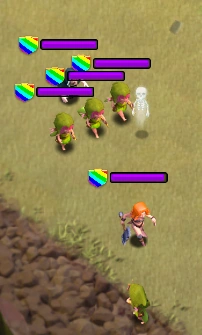
Using a Circle of Archers
A common kill squad, built to eliminate anything at any level. Again, these troops can easily overwhelm the enemy's troops and run through them. The circle of Archers, however, utilizes a circle shape to keep troops in confusion, and to minimize effect from troops with splash damage and melee troops. When the CC troops know that they're surrounded, they're but dead...
Advantages:
- Easily defeats most Clan Castle defenses - from Valkyries to Dragons
- Can be mixed into your farming army easily - an impromptu kill squad is always one of the best for normal raiding
Disadvantages:
- If you use only a few Archers at a time in the circle, the killing process will be really slow
- Requires a decent amount of space in order to use effectively - defenses can interfere with the killing process if you're not careful enough
Specialises in: Anything, really
Army Compositions this Kill Squad can be used for: Barch, BAM, basic Giant attacks
Kill Squad Composition: All Archers. What else? Use at least 15 Archers (if you're good at killing Dragons), and the most you'll need is somewhere around 30 Archers (when they are lower-leveled). Generally you will need no more than 25 once you get good with placing your Archers to kill the CC troops.
Execution:
- Draw the CC troops out completely away from defenses. If not, defenses will make you have a hard time killing the enemy CC.
- Use your finger to deploy Archers in a circle around the CC troops. Don't get fazed by air troops, just keep going in a full circle. Don't hold down with your finger or you'll find yourself running out of Archers quickly.
- Let them kill the CC troops. Hopefully, if you spaced the Archers out enough they would not be affected by splash troops such as Wizards or Dragons at all.
For TH5+
Lightning Spells
An effective method to kill CC troops with low HP. Archers, Minions, Witches can be dealt with in one Lightning Spell and maybe Wizards and lower-leveled Balloons and Hogs when using multiple. It is troop-friendly but it does require some investment into Elixir and time as well.
Advantages:
- Easy and conventional to use on low-health troops
- Does not require any sort of troops to take up housing space
Disadvantages:
- Extremely ineffective against high-health troops like Dragons
- Power dependent on number of Lightning Spells you intend to use (1 is not enough on many occasions)
Specialises in: Low HP troops (Archers, Barbarians, Minions, Wizards, Witches)
Army Compositions this Kill Squad can be used for: Anything
Kill Squad Composition: At least one Lightning Spell, and up to three. You might want to use these to eliminate two things at once: the Clan Castle troops, and key defensive buildings (Mortars, Wizard Towers or Air Defenses) so there will be two execution procedures for this one. Also, bringing along a few Barbarians or Archers to cleanup whatever is left of the troops will be helpful.
Execution (eliminating CC troops only):
Lightning Spells Required: 1-2
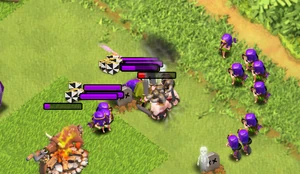
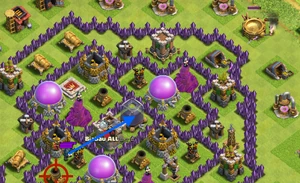
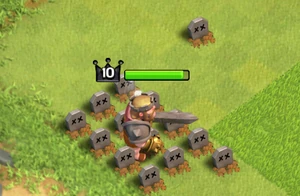
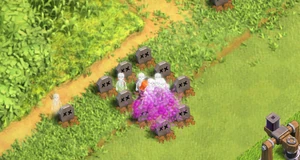
- Draw the Clan Castle troops out and group them up as tightly as you can.
- Proceed to use a Lightning Spell on the troops. As for what you should prioritize, I would go: Witches, Wizards, Minions and then Archers. Witches have potential to summon more troops and so should be eliminated first, then Wizards should follow due to their high HP that allows them to survive a few zaps. Minions go next due to their potential to survive a second zap, and Archers last because they will be killed in one zap no matter what (yes, even a level 1 Lightning Spell can kill a level 7 Archer in one zap out of the six they discharge).
- If any troops survive use Barbarians or Archers to eliminate them easily. If you have zapped correctly the only remaining troops should be Wizards that are critically damaged.
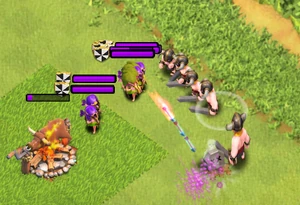
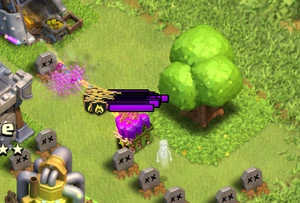
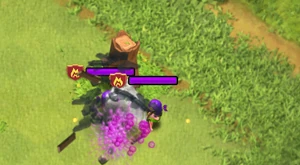
Execution (eliminating CC troops + defensive buildings):
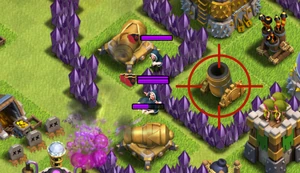
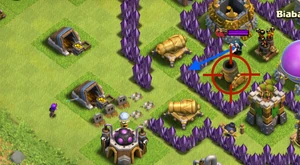
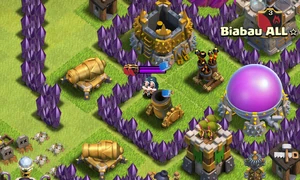
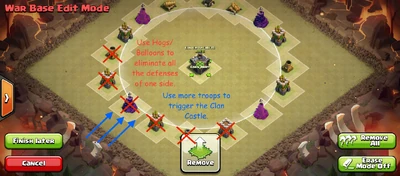
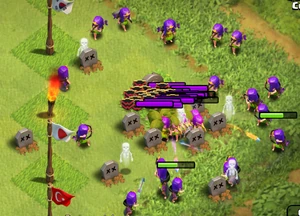
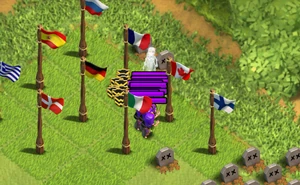
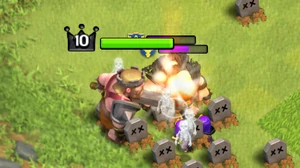
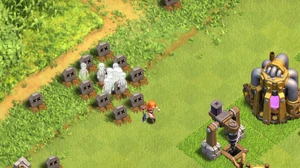
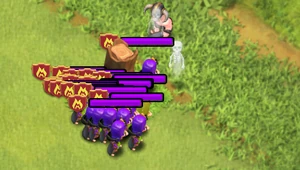
Short note on the slideshow: The red crosshair is the Mortar I'm intending to destroy in this case, and the blue arrows depict the direction of movement by the CC troops. On the second step you might not be able to see the crosshair due to the fact that they're blocked by the captions, but they're on the bottom left for your information.
Lightning Spells Required: 2-3
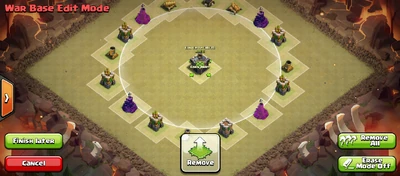
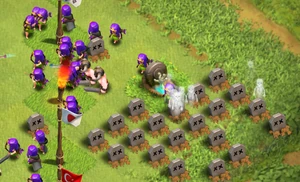
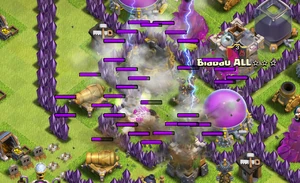
- Trigger the Clan Castle, and group them as best as you can while they are still inside the base. The effect of two or three Lightning Spells is much more devastating than that of just one, so don't worry if you don't manage to group them up too tightly.
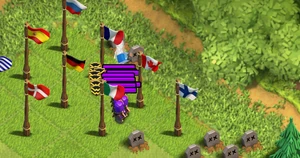
- Once the troops are grouped up use sacrificial Barbarians and Archers to draw the troops towards the targeted defense. Deploy your troop where the Clan Castle troops, defense and your troop will form a straight line, in that order. It will be slow, but it will work. Don't attempt to find blind spots, instead find a place where you can deploy within the range of defenses. If you do find a blind spot you will draw the entire Clan Castle towards your troop and not the defense you are attempting to destroy. In that case just treat them as if they were on the edge of the base and draw them back towards the defense.
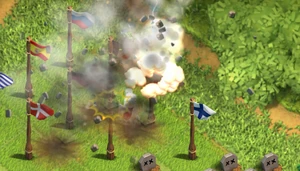
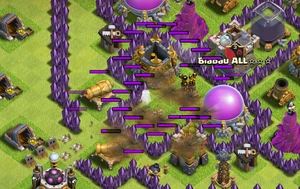
- Once the Clan Castle troops and defense are lined up, drop the Lightning! With double or triple Lightning you shouldn't need to worry about troops surviving if you drawn them on top of the defense correctly.
- Note that the above step is not always possible, so you can start the zapping when the enemy CC is at the edge of the grass surrounding the defense. If some troops manage to survive then you can use a few Barbarians and Archers to finish the job.
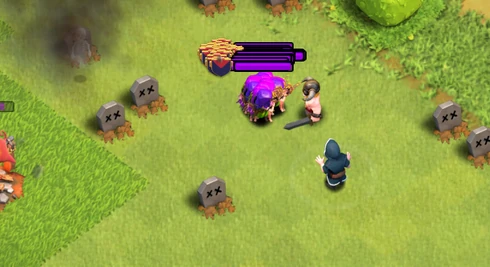
Wizards

One of the most powerful DPS troops is one great way to eliminate many troops at once. Consider the splash damage these guys input, and you can easily eliminate an entire CC defense with a Wizard and a couple of supporting distractions. It's great once you unlock them, but it is definitely nicer when they are upgraded to a higher level (level 4 is sufficient to kill a max Wizard in one hit, and level 5 will be enough to suit anything).
Advantages:
- If used correctly it can cut on housing space required for killing CC easily, due to it being able to eliminate extremely tight groups entirely
- High DPS = quick killer
Disadvantages:
- Just as vulnerable to death as your Archers (defending Wizards and Dragons can usually oneshot them easily), and the fact that it takes up 4 housing space instead of one does not make it more resistant against single target troops
- Slower attack speed means that without distractions, defending troops are more likely to kill the Wizard before your Wizard can even attack (this can hold true against Wizards and Dragons)
Specialises in: All-Wizard defenses, any groups of troops with the same movement speed (e.g. Barbarians and Wizards)
Army Compositions this Kill Squad can be used for: Giant-Wizard (and variations), mass Wizards (and variations), GoWiPe, GoWiWi (and other variations)
Kill Squad Composition: You will want to bring up to 10 Barbarians and/or Archers to distract defending troops so that your Wizard can eliminate them all at once. Obviously bring at least one Wizard, but it is always recommended to have two or three in your army in case the first fails to completely destroy the entire CC defense.
Execution:
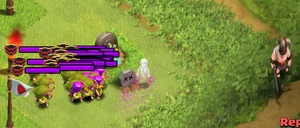
- Make sure that the group of Clan Castle troops is grouped as tightly as possible before dropping your Wizards. Remember, the Wizard has only a small splash radius so the pack must be really tight in order for this kill squad to be a massive success.
- Now deploy your distraction troops, Barbarians and/or Archers. If all the CC troops are moving with the same speed (see the "All Troop Movement Speeds" chart above), you can use Archers, otherwise use Barbarians. Deploy the distraction troops as close as possible to the CC troops while keeping out of range of any defenses.
- Without further hesitation, deploy your Wizards (1 is enough for higher-leveled Wizards, otherwise you should use two fingers to quickly deploy two Wizards, one on either side of the CC troops) before your distraction troop is finished off. If you weren't prepared to deploy your Wizards, save them for now, and repeat from step 2, reacting more quickly this time.
For TH7+
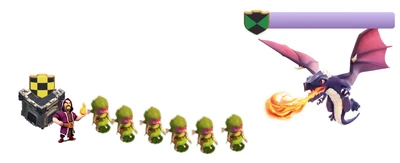
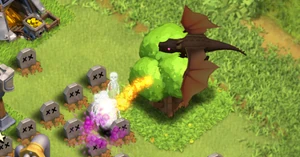
Dragons

This powerful flying troop is many times often the last resort, but given the right situation it can also double as a serial troop killer. It will be slow to work through massed amounts of spread-out troops, however, due to its small splash radius. Again, a great killing troop when you unlock them, but of course they are greater when upgraded.
Advantages:
- Great HP means it will last rather long against persistent fire from anti-air troops
- Rather easy execution (not many taps required to execute)
Disadvantages:
- Slow attack speed means that against spread-out anti-air troops, it is likely to go down
- Costs a high housing space for even one Dragon - two is far more than enough
Specialises in: Troops that can only attack ground, and tightly-grouped troops (groups of troops with the same movement speed is optimal), Witches as well
Army Compositions this Kill Squad can be used for: Mass Dragons, Dragon Riders (Hogs + Dragons)
Kill Squad Composition: Have a few Barbarians and Archers for 1: grouping purposes and 2: distraction purposes, bring up to 10 for both and this lets your Dragons eat up (not literally) the CC troops. In most cases one Dragon is enough, but in case the enemy packed a high-HP troop like Valkyries in the CC, you might always want to bring a second. No more than two Dragons, or this will eat up (not literally) your Army Camp space easily.
Execution:
- Make sure that the group of Clan Castle troops is grouped as tightly as possible before dropping the Dragon. Be sure of that, because you only have two at the most! If the Clan Castle troops don't look like they can be all taken down within five breaths of the Dragon (less if there are more Wizards), group them tighter with your Barbarians and Archers.
- Deploy your distraction troop, the Barbarian or Archer, in a similar way as described in the Wizard section. If they are already grouped tightly be sure to deploy the troop right where the CC troops are standing, as to minimize their movement.
- Immediately afterwards, deploy the Dragon. If you brought two, drop the other Dragon on the opposite side of the first Dragon. This is because you will want to minimize the splash damage dealt to the Dragons. Never drop them on top of each other because Wizards can hit both of them at the same time.
Heroes

A one or two man kill squad, consisting of the Barbarian King and/or Archer Queen. When they are a high-enough level they can, with some assistance from supporting troops like your own CC complement, be great in eliminating enemy Clan Castle troops, whether they tank your supporting troops or support the killing process from behind.
NOTE: I strongly would not recommend this kill squad if your Heroes are below level 5 (i.e. do not have an ability). An Archer Queen is highly recommended, but if you have enough support troops you can be able to pull through without the Archer Queen.
Advantages:
- Great against large troops, especially Tier 3 (Dragons, PEKKAs)
- Helps your support troops (and perhaps your own Clan Castle) to beat out the enemy CC troops
Disadvantages:
- Not too great against massed troops (both heroes are single target and are easily overwhelmed by them)
- Not a good option for armies dependent on Heroes (e.g. GoWiWi)
Specialises in: Tough troops like Dragons and PEKKAs, can kill Golems and Lava Hounds quickly as well if used correctly
Army Compositions this Kill Squad can be used for: Armies that are not too reliant on Heroes to deal damage (e.g. Hogs, Quatrolavaloonion, etc.)
Kill Squad Composition: Bring all the Heroes you can bring. Have them as high leveled as possible, but against massed troops level 15 would be sufficient (if you can't upgrade them to that level at your TH level then have them maxed out). You might want to bring some support troops, maybe 20 Barbarians/Archers or a few Wizards or some Witches. All would help in your fight to conquer the enemy Clan Castle troops.
Execution:
- Draw out the Clan Castle troops. Heroes have single target attacks so grouping isn't important but it may be vital for your support troops if you brought Wizards.
- Isolate any Wizards you may find in the midst of the Clan Castle defense, using a few Barbarians or Archers to move them around. This is especially important with lower-leveled Heroes where Wizards can do significant damage. Consult the table below for information about the hero levels required to one-shot Wizards.
- Drop the support troops to keep the Heroes away from enemy Clan Castle troop fire, then the Heroes themselves. An Iron Fist or Royal Cloak Ability may prove useful if there are a large amount of troops or if the Heroes cannot one-shot Wizards.
Table of Minimum Level of Heroes to one-shot a Wizard: (note that all Wizards below level 4 can be one-shot by Heroes regardless)
| Hero | Level 4 Wizard | Level 5 Wizard | Level 6 Wizard |
|---|---|---|---|
| Barbarian King | Level 1 | Level 6 | Level 8 |
| Archer Queen | Level 5 | Level 12 | Level 14 |
For TH8+
Valkyries

These beasts of melee splash magic are a great way to take care of low-health troops, most especially Barbarians. The fact that they can tank quite a bit of damage means that it will usually have a chance to attack before the enemy troops can kill them clean.
Advantages:
- Great for grouped infantry troops that it can usually destroy in one hit
- Can also significantly cut housing space required to eliminate the Clan Castle troops
Disadvantages:
- Cannot deal with air troops whatsoever
- Neither can it deal with troops with high HP quickly and easily
Specialises in: Barbarian and Goblin CC defenses, super-grouped Tier 1 and 2 troops (Witches included)
Army Compositions this Kill Squad can be used for: Mixed in any ground TH8+ army, for example GoVaPe
Kill Squad Composition: You'd need at least one Valkyrie, preferably two or three should the execution go wrong. You will also need some distraction troops, preferably around a few Barbarians due to his ability to keep troops together when they're oh-so-perfectly grouped together, and his durability. Any level of Valkyries is acceptable, however having them at least level 2 is helpful due to its ability to kill a level 6 Wizard in one hit, something level 1 Valkyries are incapable of doing.
Execution:
- Before you start, make sure that the group of Clan Castle troops are as tightly grouped as possible. They do not need to be as tight as the group you'd use for Wizards or Dragons, but still.
- Deploy the distraction troop smack in the middle of the group, to keep the CC troops distracted yet still grouped.
- Deploy the Valkyries at the same spot you deployed your troop before your distraction troop dies off. Hopefully, unless your Valkyrie is level 1 going up against maxed Wizards, the CC troops should be mostly eliminated in one swing. In the case that your Valkyries are level 1 and are facing off against maxed Wizards, use only one Valkyrie, to weaken the Wizards, and finish off with a few Archers or Barbarians.
Balloons
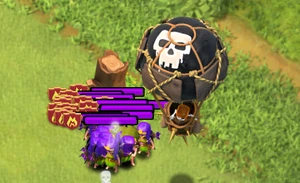
They do not seem like a good idea to be a kill squad owing to the fact that they target defenses first, but hey, you're missing out on one thing: the death splash! By using the CC troops to your advantage to help shoot your Balloon down, you can get your Balloon to defeat the Clan Castle troops! Provided, that the CC troops show up in your favour.
Advantages:
- Can easily defeat slightly tight groups of Archers or Wizards easily
- Can be mixed into powerful air armies
Disadvantages:
- Does not work against air troops
- Not suitable for CC defenses that have none or low anti-air DPS (e.g. 1 Archer, or some Barbarians)
Specialises in: Filled defenses of Archers and Wizards (the more the merrier)
Army Compositions this Kill Squad can be used for: Balloonion, and any of its variants (surgical Balloonion, Lavaloonion, etc.)
Kill Squad Composition: At least two Balloons, level 5 or above, preferably maxed out (if you're skilled enough in doing this), and bring at least four otherwise in case you'd fail to take out the CC troops. Have some troops for grouping purposes (grouping tightly isn't going to be everything here), perhaps some Minions you would possibly happen to bring along for the attack. One thing to note: If you are using a Loonion army (or its variants), try not to waste too many troops for this purpose!
Execution:
- Group the defending troops up with your own troops. They do not need to be super-tight, but in case the CC troops disband themselves while your Balloon is being deployed, try to get them as tight as possible.
- Deploy the Balloon. You have to be precise, as every attempt in executing this step will cost one Balloon. Make sure that it passes over the CC troops as it flies towards its targeted defense, by finding a line between the defense and the CC troops, and deploying along that line.
- You will have to decide how far away your Balloon should be deployed from the CC troops. The more troops that are there defending, the closer to the CC troops you'll have to deploy your Balloon. Have them around 1 tile away from the defending troops. If there are lots of Wizards, you can get away with deploying slightly further away owing to the fact that Wizards fire slower.
- Watch the Balloon go down, and if you have done it correctly, watch Archers die in one hit, and Wizards level 5 or below die in one hit as well (applies only to level 6 Balloons; if you only have level 5 expect to only be capable of one-shotting level 3 or lower Wizards). Note that level 6 Wizards require at least two shots to go down, so if you want to you may finish him off with some Minions or Archers.
Poison Spells
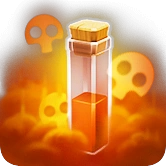
Poison Spells have been, ever since introduced in July 2015 and later buffed furthermore in September that same year, one of the most common and one of the easiest methods to eliminate Clan Castle troops at mid-high levels. It practically obsoletes almost every other kill squad, including the Lightning Spell, but fortunately, it isn't too overpowered, though it can still be used to assist in helping other kill squads eliminate Clan Castle troops.
Advantages:
- Works on all Tier 1 and Tier 2 troops, and most Dark Elixir troops, with only the strongest troops able to survive a direct poisoning (Dragons, PEKKAs, Golems and Lava Hounds)
- Can be mixed into practically any kill squad and make it easier for the kill squads to finish the job. Dark Spell donations make this even more of a possibility
- Compactness mean you will never need the Lightning Spell as a kill squad ever again
Disadvantages:
- As stated earlier, Dragons, P.E.K.K.As, Golems and Lava Hounds (and possibly Valkyries and Giants in the case that you are using a low-level Poison Spell) can survive a single Poison Spell, which means you'll need more than one Poison Spell or simply the assistance of another kill squad
- Despite its venomous power, it is a Town Hall 8 and up weapon of choice - sorry Town Hall 7s and below!
Army Compositions this Kill Squad can be used for: Anything, really. It fits onto every army composition regardless of whether it is ground or air.
Kill Squad Composition: 1 Poison Spell is sufficient in most cases, and you have your own army as a backup. If your Clan Castle is capable of receiving your clanmates' spells, you might want to carry an extra Poison. The extra really helps if it's a first attack in war or when you are outside of war.
Execution:
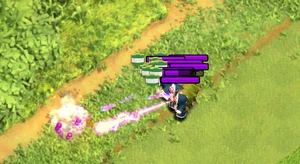
- Group the defending troops if they are spread out too much. If not, skip this step. The radius of the Poison Spell is 4 tiles, as a reference, so if troops at one end are more than 8 tiles away from the other, do a bit of grouping.
- Deploy the Poison Spell in the center of the group, such that every troop is hit. The group should not be moving, otherwise you may miss some of the troops. You do not need to do this outside of the base's outermost Wall layer, if you lured all of the troops you can deploy the Poison Spell within the base itself.
- Should you realize that some of the CC troops are outside the poison's effect (probably because you missed them), draw them back in using extra Archers, or Barbarians or other fragile troops. Try not to make affected troops leave the Poison Spell's area-of-effect while doing this.
- Deploy a second Poison Spell, if you have one, if you need to (e.g. when facing Dragons.). In most cases, however, you can use part of your army or a backup kill squad to finish off the CC troops if they survive the poison, or better still, have them engage the CC troops while they are under the effect of the poison, as the enemy CC troops attack slower while poisoned.
- Any surviving CC troops (either because they were capable of surviving the poison or because you missed them) should be finished off by your own army or kill squad.
Conclusion
Well it's been a long guide, even longer than that of the Walls guide :/
Before I go off I'd like to somewhat apologize to some players who have had their own CC troops taken down once for the purposes for the guide. I know that some of them might be normal (e.g. the Lightning Spell one) but some looked like they are purely for fun or something along those lines (e.g. Dragons :P)
Hope you enjoyed this long guide! And I actually hoped you spent a while reading this guide as well :)
Feedback
If this Strategy Guide contains any inappropriate content, please report it here: Clash of Clans Wiki:Report