
So, Traps. One of two things that can turn raids horribly wrong, the other being any Clan Castle troops.
With good enough usage and placement of traps, they can and will co-operate with your defenses and hopefully net you a defensive victory. Or they can save a Gold Storage from getting eaten up (not literally) by any Goblins lurking near it, keeping that extra resources safe for you to use in your upgrades.
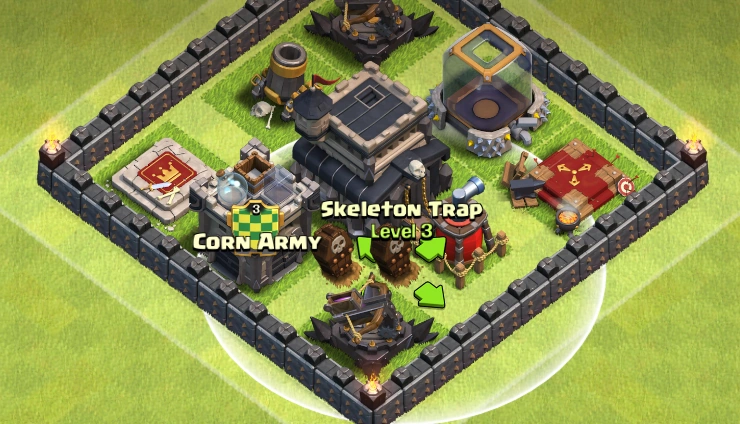
Hello Chief, this is my guide on Traps. Yes, it does include that Bomb over there (--->) but surely it is not limited to it :D
Introduction to Traps
trap
/træp/
noun
Any device, stratagem, trick, or the like for catching a person unawares.
Off with the dictionary meaning. We don't need to be too technical here. Anyways, Traps in Clash of Clans are hidden structures, yet not buildings, that are were one time use. Basically what they do is they wait for a troop to come near it, then it will reveal itself, and be triggered, potentially causing damage to the attacker's army.
Traps have to be re-armed after their usage in battle: doing so will cost Gold. Otherwise it won't work for future battles. Not until you rearm them, that is.
However, in Clan Wars they will remain armed and ready no matter what the situation.
| Need to be Destroyed for 100%? | Single Use? | Hidden? | Upgradeable? |
|---|---|---|---|
| No | Maybe (depends on whether you re-arm it) | Yes (to enemies only) | Yes, In the new update all traps including Spring Traps. |
Traps versus Troops
Well, different Traps don't work very well against certain troops. There's no one-size-fits-all trap in this game. Which means each trap is not very usable against certain troops. For example, would you expect a normal Bomb to do too much damage to a maxed Giant? Think about it or not, the answer's no because the damage dealt would be insignificant. In addition to that case the Giant can be very easily healed back up to normal. Below are two tables stating whether each trap works well against the troop it can target. And reasons for selected decisions on my part.
Ground Troops
| Barbarian | Archer | Goblin | Giant | Wall Breaker | Wizard | P.E.K.K.A | Hog Rider | Valkyrie | Golem | Witch | |
|---|---|---|---|---|---|---|---|---|---|---|---|
| Bomb (grouped in 2 or 3) | Yes | Yes | Yes | No | Yes | Maybe1 | No | No | No | No | Yes |
| Spring Trap | Yes | Yes | Yes | Yes | Yes | Yes | No | Maybe2 | Yes3 | No | Maybe4 |
| Giant Bomb | Yes | Yes | Yes | Maybe5 | Yes | Yes | No | Maybe6 | No | No | Maybe |
| Skeleton Trap | Yes | Yes | Yes | Maybe7 | No | Yes | Yes8 | No9 | No | No | No10 |
1 Wizards are likely to survive two or even three Bombs, hence it is not always the most effective.
2 Although it usually springs off 3 at a time Hogs are usually deployed in large amounts, which makes double Giant Bombs more viable (see 6).
3 It does spring off Valkyries but can only spring off one at a time.
4 The Witch's Skeletons are more likely to be sprung off than the Witch; also it can only spring off one Witch at a time.
5 If the Giant is low-leveled, that is.
6 When paired, they're definitely great. Otherwise they may be healed up easily with usage of Heal Spells.
7 Same as stated in 5, however it is unlikely that TH8+ (in order to obtain the Skeleton Trap) would be attacked by low-leveled Giants anyways.
8 Two skeletons from the trap distract the P.E.K.K.A for 5 seconds. This is made even longer with higher-level Skeleton Traps.
9 It is definitely plausible but it'll take a while for even four Skeletons to take out an entire hog army: again double Giant Bombs are better.
10 The defending skeletons from the trap are likely to be fought off by the Witch's skeletons itself.
Air Troops
| Balloon | Healer | Dragon | Minion | Lava Hound | |
|---|---|---|---|---|---|
| Air Bomb | Maybe11 | N/A* | No | Yes | Maybe12 |
| Seeking Air Mine | Maybe13 | N/A* | Yes | N/A* | Yes |
| Skeleton Trap | Maybe | Maybe14 | No | No | No |
* This trap cannot affect the stated troop.
11 Lower-leveled Balloons can go down easily to two of these placed together.
12 If it detonates just as the Lava Hound dies it can easily blow up all the Lava Pups it spawns. However this is very unlikely.
13 It sure can be one-shotted however it is usually a waste of a powerful trap on 5 housing space.
14 Although Healers cannot trigger air traps they can still be affected by nearby Skeleton Traps triggered by other air troops.
Spring Traps
This is the simplest trap to explain so I'll start with this one. This trap will be able to bounce off up to 19 housing space worth of troops at the max level and it'll completely disregard level of the troops. Which makes it a great usable trap for all levels and it'll be the cream of the trap crop if you never bothered upgrading your traps anyways.


One best use of Spring Traps is taking out Giants. Place them behind defenses and force them into one small corridor and BOING!!! Up to 3 great Giants are taken down with just one trap. Imagine what six of these can do.
They might just be one of your only ways to survive Giants and Healers...
Case Study: Defending Giant-Healer without Air Defenses

Say this is your TH6 without the Air Defense (albeit with weaker buildings and Walls) and you placed your Spring Traps outside, next to your Mortars. A TH7 could just drop a load of Giants and 2 Healers, and he will be likely to 3-star you easily.
So picture this scenario. You are a TH6 who had just started upgrading your Air Defense to level 4. This means that, for 5 days, you won't have an Air Defense to defend against ravaging air troops! However even though you'd probably not have a chance against massed Balloons, Dragons or other air attacks, you'd still have a chance on the Healer-reliant Giant-Healer combo! Even though there is practically no way to stop the Healer you can surely eliminate the meatshields!
In the example base on the left, the Spring Traps are not well-utilized and it can be easily triggered by a single Tier 1 troop, a good way to waste Spring Traps and 2,000 Gold. If I brought a TH7 army of Giants and Healers upon the example base then there probably shouldn't be an easy way to stop neither the Giants nor the Healers. Hence, with adequate support from other troops, the Giants will most likely last the entire battle and this village would be 3-starred easily.
However this base can utilize its Spring Traps in a better way!


Considering the lower half of the base: there is a gap between the Mortar and Archer Tower so why not fill it up with some Spring Traps? Attackers are likely to start with the Mortars as they are a threat (to Archers and Wall Breakers, both pretty important) to deal with. Furthermore, they're semi-exposed so why not go for it in the first place?
Without any other manipulation of troops it can and will be a horrible idea as seen in Figures 1 and 2. As they take down the Mortar they should head for the Archer Tower which has been covered by 2 Spring Traps. As the Giants and Healers approach the Archer Tower the Spring Traps are up to do their dirty work; 2-3 Giants go down for one Spring Trap.
As they sling around the Cannon and destroy the Archer Tower on the other side, they're troubled with another set of Spring Traps as they approach the Mortar. Another 4-6 Giants would go down, if not all of the remaining Giants still standing at that point. After hitting four Spring Traps on that route, up to 12 Giants are taken out, which is a severe portion of the meatshield. The Giant-Healer attack is reduced to a Healer attack and without the meatshields to protect the support troops they are likely to be taken out quickly.
TH7 Giant-Healer armies usually have 10-20 Giants in them. Four Spring Traps can cut a severe amount out of that, and if you don't believe me I have stumbled across such a failure to 3-star a TH6 with an upgrading Air Defense because of the Spring Traps. They really can ruin a raid after all.


Considering the upper half of the base: collectors can be kicked out of the base, while the four Walls in the core are not being used very well at all; although the Walls in the core can funnel troops it will be too late to funnel troops. As Giants break into your core then support troops can easily steal all the loot, defeating the farming base.
Consider removing the Gold Mine and Elixir Collector in Figure 5 and replacing it with a simple mechanic shown in Figure 6. Again without any other manipulation of troops done by other troops any Giants coming in from the Archer Tower will be fumbling for the Cannons, weakened by the Spring Traps as they promptly throw off two or three Giants. It'll be even worse for the attacker if the Giants split as that means more Giants will be tossed off your property!
Although the TH6s can only own four Spring Traps placing the four of these traps at the side which is more likely to be attacked by the Giant-Healer attack will benefit the TH6. Or, they can be placed two on the lower half and two on the upper half for maximum overall protection of the base.
Giant Bombs

Figure 6: Your typical double Giant Bomb placement in a normal hog-ring.
I figure that placement of these are extremely important when it comes to defending against Hogs. Using these to defend against Tier 1 and Wizards, in my opinion is pretty simple: simply place a Giant Bomb somewhere in the base that is likely to be hit by Tier 1 or Wizards, and boom they go. A massed group is defeated with one big blast!
Hogs are a bit trickier. Although it is well-known that two of these big, Giant Bombs will be able to obliberate an entire pack, having this happen easily is actually harder than it looks. Skilled Hog attackers can look out for 4x2 spaces and send one hog to check for Giant Bombs in that area. If they even trigger 1 Giant Bomb that's a pair of Giant Bombs gone to waste as they will be rendered mostly harmless especially against higher-level Hogs.
Case Study: Defending Against Hog Riders
Consider the concept on the right, seen in Figure 6. This is what a typical double Giant Bomb trap in the "hogring" (a ring of defenses to make Hog Riders go around in a circle instead of into the core in an anti-hog base, primarily built to defend against Hogs) would look like. Surely if the Hogs come in from either end, heading towards the Cannon or the Mortar, destroy one of the defenses and then head for the next, they'll trip the double Giant Bombs and that's it for them. However, a skilled attacker will most likely deploy a Hog Rider or two between the Cannon and the Mortar, hitting one Giant Bomb in the process. In that case, when a pack of Hog Riders destroy either the Cannon or Mortar, and head towards the other, only one Giant Bomb will be triggered and this means the Hogs can survive, and subsequently be healed back to full health with a Heal Spell, rendering the traps useless, and, adding insult to injury, charging you with an extremely high re-arm cost (outside of war, that is).
Solution 1: Create fake "DGB" traps if you have an odd number of Giant Bombs


If you are Town Hall 8 or 10, you will have 3 or 5 Giant Bombs respectively. This means that you can pair up all but one of your Giant Bombs. For TH8 you will make 1 real pair of Giant Bombs and 1 fake 4x2 space containing 1 Giant Bomb on the outside. That way when Hog attackers come up to your base they might trigger the fake DGB and think that they have taken out your DGB (when in reality they have only eliminated the fake Giant Bomb and not the real DGB threat). They may get confident that your double Giant Bomb is out of the picture and the base rendered safe for Hog attacks, when in reality they are not. However you must beware that more experienced Hog attackers will check every 4x2 space for DGB traps; if they have found two separate DGBs in your TH8 (or four separate DGBs in your TH10) you are practically done for!
Solution 2: Force the Hogs away from the gap between the two defenses


This is probably the easier way and more suitable method especially if you can't create fake DGB zones (e.g. you are TH7 and both of your Giant Bombs are used on the real thing). You can surprise the Hogs and divert them away. Consider Figure 7 as an example. Deploying a few tiles away from the gap that can easily trigger the double Giant Bomb and render it harmless (let's assume imaginary non-defensive buildings forcing the spawn-zone outwards, they will be directed towards the Hidden Tesla and once it is taken down they will head for the Air Defense, and most likely fail to trigger a Giant Bomb until it is needed to defend your base.
However you should not place defenses as shown in Figure 8. Any Hog attackers that deploy Hogs by the Archer Tower will funnel the Hogs from the Archer Tower right into the gap between the Air Defense and the Wizard Tower. This means that only one of the Giant Bombs will be triggered at a time, which allows time for the attacker to place a Heal Spell and render the other Giant Bomb useless as well.
Skeleton Traps
This trap that was added in the 2014 Halloween update didn't seem like a big deal when it was released since it only summoned four measly Skeletons to fight your massive army that could very easily decimate them... right? Sure it is not a Giant killer nor is it a trap to blow up all your Barbarians to bits, but the purpose of this trap was more to distract instead of actually killing off a good portion of an army.
The effectiveness of this trap depends on both the level of the Skeleton Trap and the troops that will be dealing with the Skeletons. Consider how long an attacker's troops will take to kill off these Skeletons, that's how effective your Skeleton Trap is. The longer the army takes to kill off all the Skeletons, the more time your defenses will be given to damage the attacker's army. And the more successful the job played by the Skeleton Trap to distract.
This means that the Skeleton Trap will be extremely effective against PEKKAs which requires 10 seconds to destroy four Skeletons, however not so effective on splash damaging troops like the Wizard or Dragon which can, in one shot, destroy all of them at once in a mere 1.5 seconds.
Case Study: Defending against the Ground Phase of Air Attacks

The Skeleton Traps can stop dead any Heroes in their tracks. They will be distracted for a good deal of time, in which your defenses can deal good damage.
This is rather common in the Champions League; an air attack, say Lavaloonion, will usually destroy about 40% of the base while leaving half of the core defenses and the Town Hall standing. The attacker, thirsty for cups and the prospect of the 2-star, decides to attack the Town Hall from the side that was destroyed. The attacker's attacking YOU, and he knows that there's a lot of cups at stake for the 2-star. He deploys his level 40 Heroes, all set and confident to smash down your TH, hoping there's nothing much to stop his mighty heroes, with no Infernos standing and one X-Bow down on your base.
The Skeleton Trap helps you create some extra resistance in case there's no more hope. Placing them as shown on the right, might help you save your cups. Heroes might take a good deal of time taking out the Skeletons, saving you valuable time. If they take 5 seconds that might be a lot - defenses in the core are bought much time by the Skeleton Trap after all. Consider a maxed X-Bow the only thing dealing damage in that area apart from the Skeletons - it can deal 400 extra damage with those 5 seconds - and that 400 damage can mean the difference between a hero surviving and a hero knocked out.
You may also be optimistic in the fact that the Skeleton Trap causes panic for some, and this may make them use the abilities in an attempt to make sure the Skeletons stay dead. The abilities, which might've been better used for a mostly guaranteed destruction of the Town Hall in the case of a level 40 Queen, might be wasted by the Skeletons. Again, 5 seconds to eliminate the Skeletons is a lot - it means that any Iron Fists will not have very significant effect as it really lasts for only 5 seconds as the other 5 were wasted on the Skeletons, and also, the Royal Cloak would expire in those 5 seconds, which means the Queen can't do colossal damage on your base as they were wasted on the Skeletons.
Case Study 2: Defending against GoWiPe


Skeletons coming from the trap don't seem to do much, but when combined with powerful defenses like Teslas and X-Bows, they can be lethal.
Before the era of the Skeleton Trap, there were sneak peeks. Back then, I was watching a Youtuber who stated that "GoWiPe would be a bit harder after the update"[reference coming soon]. Sure enough, the Skeleton Traps can do a good deal of distraction for the PEKKAs in GoWiPe, effectively slowing the PEKKA and Heroes. And if only the PEKKA were coming up to the Town Hall, it could be up to 10 seconds per trap, in which Infernos, Heroes, Teslas and X-Bows could do away with most, if not all, of the PEKKAs before they even get a chance to attack the Town Hall.
If improperly used on the outside of the base it could be easily wasted by Wizards from the army, or even spare troops. Placing them like shown on the right, allows maximum damage on any PEKKAs in a maximum amount of time, and when combined with any Clan Castle troops it is potentially lethal.
Just take note that some GoWiPe players bring Lightning Spells with them; rendering Skeletons from the trap harmless. This means that when placed next to a Clan Castle, that is filled with say, Archers, they will sortie out of the CC as a group, and even though this combination deals more DPS than the CC troops alone it is much more vulnerable to Lightning Spells.
More coming soon!